The stakes in a giant prop’s box only work in dirt. The Home Depot manual for the 12.5-foot Giant Deadwood Skeleton says to use them “If the 12.5 ft Giant Deadwood Skeleton is assembled on soft ground.” On a wood, tile or vinyl floor that step doesn’t apply, and what the makers offer instead is weight on the base and a line to something solid, neither of them in the box.
Four more things catch people out indoors. The weight goes on the base, not the figure. You choose the spot before you build, because the manuals say not to move it once it’s up. Flooring makers warn that rubber-backed mats and rugs can stain a floor, and in our reading that rules out the obvious non-slip pad too. And a strap to the wall holds only as well as the screw or anchor it’s tied to.
Posing, joints and outdoor anchoring (chairs, fences, trees, lawns) are in our guide to posing life-size skeletons, and the tether that ships with the 12-foot Skelly is covered in the store guide’s section on keeping a giant standing.
What the Manuals Say About Hard Floors
Three Home Depot giant-prop manuals and one Haunted Hill Farm animatronic manual cover this. None of the three Home Depot manuals says the prop is for indoor or outdoor use. All of them assume a flat floor:
- 12 ft Giant Sized Skelly: “Assemble and place the product on level surfaces only.” Its warnings add “Item should not be grabbed, as it becomes a tipping hazard” and “Don’t push or tilt product.” A pictogram on the last page reads “USE WEIGHTS ON THE BASE” (Skelly manual).
- 12.5 ft Giant Deadwood Skeleton: stakes only “on soft ground,” and “Position the 12.5 ft Giant Deadwood Skeleton on flat surfaces only” (Deadwood manual).
- Hovering Witch: “Ensure that the floor or surface that the item sits on is flat and level” (Hovering Witch manual).
- Haunted Hill Farm Lunging Pumpkin Carver: “This product is for indoor or covered outdoor use only,” and it “should be on a level, stable surface to prevent it from falling over” (Haunted Hill Farm manual).
For a floor you can’t stake into, the Skelly and Deadwood manuals give the same answer: “If your application requires additional stability, add weights on top of the base (for example sand bags,” with sandbags “not included.” The Skelly manual adds guy wires and the Deadwood manual guy lines, also not included.
The Hovering Witch manual doesn’t mention weights at all, and its warning list says “Don’t add to or modify product,” with no exception. The Skelly’s version reads “Do not add to or modify unless accessory is designed for product.” Our reading, for the Skelly and Deadwood: a sandbag resting on the base, as their manuals suggest, or a restraining strap looped around the frame doesn’t modify the prop. Drilling it, gluing to it or sticking an adhesive pad on it does, so don’t.
The Hovering Witch is different. Its manual gives no weighting or tether method and allows no additions, so we won’t suggest one. Before you add anything to it, ask the maker: the manual lists SVI Customer Service at 1-855-428-3921 and [email protected]. Until then, stand it where nobody walks past or reaches it.
Pick the Spot Before You Build It
The Skelly and Hovering Witch pictograms both say “NO MOVING AFTER FULLY ASSEMBLED.” On the Deadwood skeleton, two of the four base extensions go on only after it’s standing, so the full footprint doesn’t exist until the figure is upright where it will stay. Build it in the room where it will stand. Before the first box is open:
- Measure the ceiling. The Skelly is 12 feet and the Deadwood 12.5, taller than most rooms. Neither Home Depot manual we read gives base dimensions, so lay out the base parts on the floor and measure them before you commit to a corner.
- Measure the path. A figure you can’t move once assembled can’t be walked through a doorway at the end of the season either. It comes down and apart where it stood, and the Skelly manual says “The item must be laid down for disassembly.” You need floor space as long as the prop is tall to lay it down.
- Count your crew. The Skelly manual strongly advises “that 3 adults participate in the assembly, standing the skeleton up, setting the skeleton down, and disassembly,” and the Witch manual recommends “2-3 adults.”
- Leave room for it to move. The Pumpkin Carver manual says “Item may jump or pop up so leave enough clearance.” Put a lunging prop where the lunge ends in open air, not at a coffee table edge or a guest’s shins.
Indoors also changes the sensor. The Pumpkin Carver manual says its IR sensor reaches farther in a cool room and less far as the room gets closer “to body temperature 98.6° F.” A living room full of costumed guests is warmer by the end of the night than the empty room you tested it in, so set it off from where guests actually stand, late in the evening, before you decide it’s in the right place.
For which store props take a step pad or a try-me button instead of a sensor, see our animatronic triggers guide.
Weight the Base, Low and on the Lean Side
Every maker that says where the weight goes puts it at the bottom. The Skelly and Deadwood manuals say “on top of the base.” The Pumpkin Carver ships with its own sandbag, and its manual says “Place SANDBAG onto the top of the BACK FOOT to secure the item to the ground.” The same manual, in red: “To avoid damage do not pick item up while SANDBAG is on top of BACK FOOT.”
The same manual’s red warning box says “DO NOT PLACE WEIGHT ON ITEM WHILE IN OPERATION.” Our rule for every prop follows from it: weight goes on the base, never on the figure. Weight up high also makes a tall prop easier to tip.
Film crews bag their stands as routine. Matthews Studio Equipment, which makes grip stands and sandbags, says “Sandbags are used whenever you need extra weight to prevent tipping. You usually ‘bag’ stands, especially when the weight is off center” (Matthews sandbags). For its C-stands: “Every time the arm extends past the base, put a sandbag on the tallest leg, under the load” (Matthews). Lighting-stand makers build the same idea into the stand. Chauvet DJ’s FLEXstand weighs 44 pounds in all, and 36 of those pounds are its cast-iron base plate, 21.5 by 21.6 inches and 0.6 inch tall (FLEXstand manual).
The two rules aim at different props. Matthews bags the leg under a load that hangs out past the base; the Pumpkin Carver’s maker bags the back foot of a prop that lunges forward. When the manual says where, follow the manual. When it doesn’t, our method is to put the weight on the base wherever the prop reaches past it: under an outstretched arm, a raised scythe or a lantern held out to one side. (Not the Hovering Witch; see above.) For a lunger, weight the foot opposite the lunge, as Haunted Hill Farm does.
No maker we found gives a weight in pounds for any of these props, so we won’t invent one. Don’t test by shoving it: the Skelly, Deadwood and Hovering Witch manuals all say “Don’t push or tilt product,” and the Pumpkin Carver’s says “STAY CLEAR OF ITEM WHILE OPERATING.” Our check is hands-off. Drape the bags across the base frame, run the prop through a few cycles from a step back, and watch the base. If any corner rocks, lifts or creeps across the floor, add weight or a tether (next section).

IALNAI Canopy Weight Sand Bags, 4 Pack (Sand Not Included)
Saddle-style canopy bags that drape over a leg or a base bar. The listing rates the set at 125 pounds when filled. Fill them outside, double-check the zippers, and lay them on the base frame, never on the figure.
Tie It Back to the Wall
Weight stops a base from sliding and lifting. A strap to the wall stops the top from going over. The Consumer Product Safety Commission runs a whole campaign on this for furniture and TVs: 17,800 people a year are injured in furniture, TV and appliance tip-overs, and children under 18 account for 44 percent of them, “amounting to a child being treated in an emergency department (ED-treated) every 53 minutes.” Of 217 reported tip-over deaths from 2013 through July 2023, “55 percent involved children between 1 and 3 years old” (CPSC). CPSC’s numbers are for furniture, TVs and appliances, not decorations. A 7-foot animatronic in the corner of a room where kids are running around is the same kind of problem, so we borrow its fix.
Studs and brick
CPSC’s Anchor It instructions are written for dressers, and they carry straight over:
- “In modern homes, studs are spaced 16 or 24 inches apart from one another.” Use a stud finder, and move the prop to the stud rather than the other way round.
- “Drill a hole into the stud making sure you feel resistance the whole time, otherwise you may be missing the stud.”
- On brick, “pick a spot on the face of the brick and not the mortar between the bricks,” and use a masonry bit, hammer drill and concrete screw anchors (the tool list is on Anchor It’s what you’ll need page).
- On the item side, “avoid mounting to any thin materials.”
- To check: “Pull on the strap at the end near the wall, and again at the end attached to the item you secured. If there’s no slack and nothing moves, you’re all set.”
Anchor It says kits come with brackets that are “metal or thick plastic,” a strap that is “either heavy nylon or braided steel,” and “Almost all of them are under $20.” It also says “Usually two straps are used to make furniture more secure,” and to “read the specifications to see if they can hold more pounds than your piece of furniture weighs.”
On a Skelly or Deadwood, loop the strap around a solid part of the frame instead of screwing a bracket to the prop (see the modification warnings above), and leave the Hovering Witch out of it. On your own builds, a cabinet-style prop or a coffin, screw the bracket in where the wood is thick.

DAMILA Stainless Steel Anti-Tip Furniture Anchor Kit, 2 Pack
Two steel-cable anti-tip straps with metal brackets. The listing claims 304 stainless cable, brackets and screws, wall anchors and plugs in the box, and a quick-release so the strap unclips while the wall bracket stays put. That release is what you want for a prop that comes down in November.
QuakeHOLD’s furniture strap takes a different approach at the prop end: “Peel and press one end to the furniture, screw the other end into the wall stud through grommet hole” (QuakeHOLD). That suits a homemade prop, a tall display cabinet or a stack of crates you don’t want to drill. Keep adhesive off store props for the modification reason above.

QuakeHOLD! 4160 Furniture Strap Kit, Black
Two 15-inch nylon straps. One end sticks to the item with a peel-and-press pad; the other screws into a wall stud through a grommet. Black disappears behind a dark prop or backdrop.
When there’s no stud: drywall toggles
The federal rule for truck cargo straps states the principle plainly: the working load limit of a tiedown “is the lowest working load limit of any of its components (including tensioner), or the working load limit of the anchor points to which it is attached, whichever is less” (49 CFR 393.108). A strap rated in the hundreds of pounds, tied to a plastic drywall plug, holds what the plug holds.
If the spot you need has no stud, use a toggle bolt made for hollow walls and read its data sheet. TOGGLER’s sheet for its SNAPTOGGLE heavy-duty toggles lists an ultimate pull-out of 265 pounds for the 1/4-20 BB anchor in 1/2-inch drywall, with the footnote “Failure measured as breakage of drywall portion.” The wall breaks before the anchor does. Its notes add “Industry standards recommend 1/4 of ultimate test load,” and holding strength varies “inversely with variations in hole diameter and the distance of the load from the wall.” The BB needs a 1/2-inch hole and 1-7/8 inches of clear space behind the wall (TOGGLER data sheet).
A quarter of 265 is about 66 pounds per anchor in 1/2-inch drywall. That’s our arithmetic from TOGGLER’s figures, and TOGGLER says its values “should be used as guides only and cannot be guaranteed.” Older, cracked or damp drywall holds less.

TOGGLER SNAPTOGGLE BB Drywall Anchors with 1/4-20 Bolts, 20 Pack
The BB anchor from TOGGLER's data sheet: 265 pounds ultimate pull-out in 1/2-inch drywall, so plan on about a quarter of that. It needs a 1/2-inch hole and 1-7/8 inches behind the wall. The title says bolts are included but one listing bullet says they're sold separately, so check before you order.
Tie high, and don’t crank it
The tether that ships with the 12-foot Skelly runs from the base up to a loop on the spine. For a strap to the wall, our method is to tie it as high on the figure as you can reach solidly, around the chest or shoulders rather than the ankles: a strap low on the figure barely changes how easily the top can go over.
The strap is a restraint, not a brace. The Skelly and Deadwood manuals say “Don’t climb or pull on product,” so the strap should hang with a little slack or just touch, pulling on nothing until the prop starts to lean. Set it up so it never drags the figure toward the wall.
Snug is enough. PowerTye, which makes both cam-buckle and ratchet straps, lists “Prevents over-tightening” and “Gentler on gear and surfaces” among the cam buckle’s benefits, and “Over-tensioning fragile items” as a common mistake (PowerTye). Our worry with a ratchet strap is that it’s easy to crank hard enough to crack a blow-molded torso. Old blow molds are more fragile still: our vintage blow mold guide covers why.
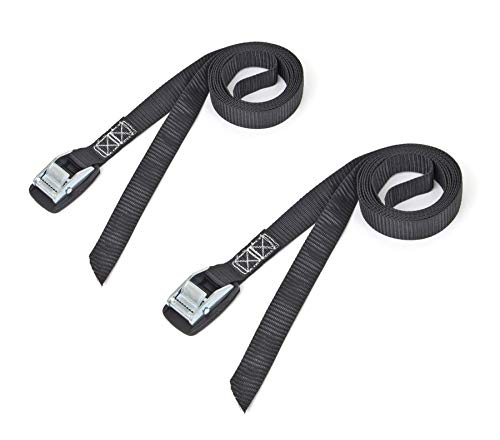
PowerTye MFG 1 Inch x 4 Ft Cam Buckle Lashing Straps, 2 Pack
One-inch polyester webbing with a rubber pad under the cam buckle, rated by PowerTye at 200 pounds working load. Loop one around a prop's chest and through the wall bracket's strap or ring, then pull it to just snug by hand. A cam buckle can't be cranked tight the way a ratchet can.
Protect the Floor Under the Base
A weighted prop base sits in one spot for weeks, which is the kind of load flooring makers warn about. Bruce, the hardwood brand: “With sufficient impact or pressure, any hardwood can dent” (Bruce FAQ).
Wide protectors, not rubber. Mannington, on its ADURA rigid vinyl: “Support furniture with wide-bearing, non-staining floor protectors. Ideally, the protectors should be at least one inch in diameter, made of non-pigmented hard plastic, and rest flat on the floor. Non-staining felt protectors are also acceptable” (Mannington). Shaw, on luxury vinyl: “As a rule, the heavier the object, the wider the floor protector” (Shaw). Shaw’s hardwood page says “Use felt pads under furniture legs to avoid scratches” (Shaw hardwood). Bruce says “We recommend using floor protectors on the feet of heavy furniture” without naming a material. Mannington prefers hard plastic on its vinyl; Shaw leads with felt. Follow your own floor maker if you know it.
Skip the rubber gripper pad. The instinct is to put a non-slip rubber mat under the base. The flooring makers say otherwise about rubber on their floors. Mannington: “Do not put rubber-backed, latex-backed or coco fiber mats on your floor because they will stain or damage the surface.” Shaw says to use mats “without latex or rubber backings to reduce possible discoloration.” Bruce: “Do not use rugs with solid backing, or those with a rubber or latex backing.” They’re writing about mats and rugs; a rubber pad under a prop base is the same material sitting on the same finish, so we apply it there too.
Never drag it. Shaw: “Don’t drag heavy furniture across the floor.” Bruce recommends “strips of 1/4″ hardboard or plywood as a runner under the wheels (if rolling) or furniture legs (if sliding),” and Mannington says to use “strips of wood or hardboard runways” even with a dolly. For a prop, that means sliding the boxed parts in on hardboard and building in place.
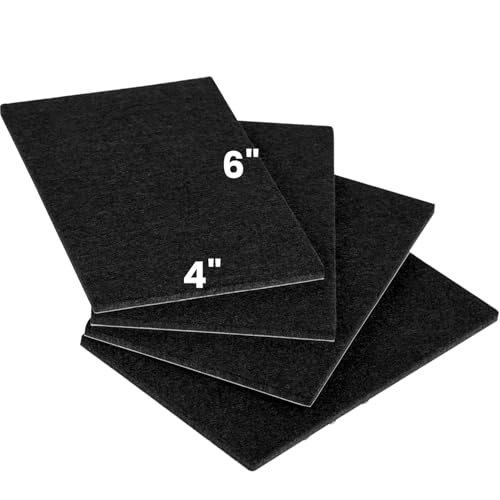
PremiFix Large Felt Furniture Pads, 6 x 4 Inch, Set of 4
The listing claims 5 mm self-adhesive felt sheets you can cut to shape. At 6 by 4 inches they're wide enough to go under the corners of a giant prop's base frame, following Shaw's rule that heavier loads need wider protectors. On a store giant, leave the backing paper on and lay them loose under the base corners, so nothing sticks to the prop; peel and stick only on your own builds.
Small Props: Museum Putty
Not everything needs a strap. A skull on the mantel, a candelabra on a bookshelf or a raven on a side table just needs to not slide off when someone bumps the shelf or a cat jumps up.
QuakeHOLD sells its Museum Putty for “antiques, collectibles, and more,” and says to “Pull off the amount needed, roll it in your fingers until soft, and apply it to the base of the object. Then, lightly press the object to the surface. You can remove it by twisting and lifting it from the base.” It says it “Comes off clean and works on most surfaces and walls. And it won’t damage furniture!” (QuakeHOLD). Its wax is pitched against “Breakage Due to Earthquakes, Children, Pets, or Household Accidents” and listed “Safe on Wood, Porcelain, China, Crystal” (QuakeWax).
We found no weight rating on either product page, so treat putty as a shelf-ornament fix. It isn’t for anything tall enough to fall on someone. Our advice for antique or unsealed furniture is to try a pea-sized piece on a hidden spot and pull it after a few days before you trust the maker’s “won’t damage.”
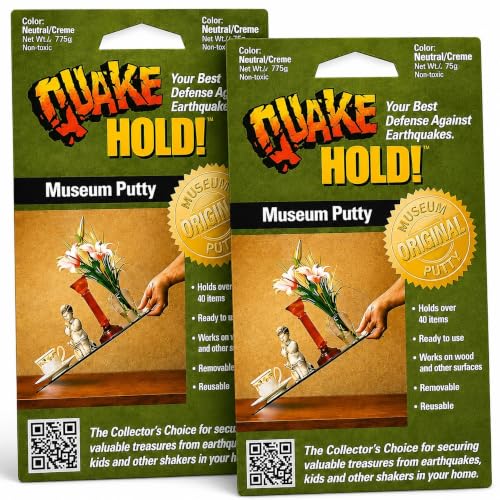
QuakeHold! 88113 Museum Putty, 2.64 oz, 2 Pack
Two 2.64-ounce packs of QuakeHOLD's reusable putty for skulls, candlesticks and bottles on a mantel or shelf.
Kids, Pets and Cords
The Skelly manual says “Children should be supervised by adults.” The Pumpkin Carver manual says “Use caution with children under the age of 14.” Both are about the prop, but in practice it’s the room: a moving figure is something kids walk up to and grab, and the Skelly manual’s warning about grabbing is the reason it tips.
The ASPCA’s Halloween advice covers both halves. On decorations: “Also be sure to keep any wires out of paw’s reach!” On the crowd: “All but the most social dogs and cats should be kept in a separate, comfortable room away from the front door during peak trick-or-treating hours” (ASPCA). A dog that bolts from a lunging prop can take the prop with it.
The cords need the same thought as the base. CPSC’s home electrical checklist says “Cords placed in the path of traffic are tripping hazards. Cords can be damaged when stepped on, creating a fire or shock hazard,” and, on furniture or rugs resting on a cord, “Heavy weights or traffic can damage cords, crushing insulation or breaking wire strands, creating a fire or shock hazard” (CPSC Pub. 513). That rules out dropping a sandbag on the adapter cable or running it under the rug. The same checklist says “Wrapped cords trap heat that normally escapes loose cords,” so don’t coil the slack tight around the base, and “Nails and staples can tear or crush the insulation,” so don’t staple a cord to the baseboard.
Run the cord along the wall behind the prop, and where it has to cross a walkway, cover it. For which props may use an extension cord at all, see the animatronic power guide.

D-Line 6 ft Floor Cord Cover, Black
A flat cover for the stretch of cord that has to cross the floor between the outlet and the prop. Black blends into a dark room. Make sure your prop's cord fits the channel.
Keep Exits and Heat Sources Clear
NFPA’s Halloween tip sheet says “Remember to keep exits clear of decorations so nothing blocks escape routes,” and “Keep all decorations away from open flames and other heat sources like light bulbs and heaters.” It also notes decorations “are the first thing to ignite in more than 800 reported home fires each year. Nearly one-third of these fires were started by a candle” (NFPA).
A floor-standing prop brings its own versions of that:
- The adapter gets warm. The Skelly manual: “Keep flammables away from the adapter, as it heats up during operation.” Don’t hide the adapter under the costume fabric or a pile of fake cobweb.
- Some props are fuel. The Hovering Witch pictogram: “THE BROOM BRISTLES FLAMMABLE. KEEP AWAY FROM HEAT, SPARKS, AND FLAMES.” The Pumpkin Carver manual: “Do not position the decoration near candles, sources of heat, or in direct sunlight.”
- Space heaters. CPSC’s checklist says to move a heater “at least 3 feet away from combustibles and check that nothing could fall or lean onto the heater.” A tall prop with a fabric robe is both.
- Hallways and doors. The International Residential Code sets the minimum width of a new house’s hallway: “The width of a hallway shall be not less than 3 feet (914 mm)” (IRC 2021 R311.6). That’s a building rule, not a decorating one, but our rule of thumb follows it: a prop and its base shouldn’t leave less than 3 feet of clear floor in a hallway, and nothing goes in front of an exterior door. Our haunted hallway guide puts its figure off to one side for the same reason.
Frequently Asked Questions
Can I use the stakes that came with my giant skeleton indoors? No. The Deadwood manual only calls for its stakes “on soft ground.” On a hard floor, both giant-skeleton manuals point to weights on top of the base and guy lines or guy wires, none of them included.
How many sandbags does a 12-foot skeleton need? No maker gives a number. Drape bags over the base frame, run the prop from a step back without touching it, and if the base rocks or creeps, add weight or tie the top to a stud.
Where do the sandbags go on an animatronic? Wherever its manual says. Haunted Hill Farm’s Pumpkin Carver puts its included sandbag on the back foot and says not to lift the prop with the bag still on. With no instruction, put weight on the base, on the side the prop reaches or leans toward, never on the figure. The Hovering Witch’s manual allows no additions, so ask its maker first.
Will a rubber non-slip mat stop my prop sliding on hardwood? It may, but Mannington, Shaw and Bruce all warn against rubber- or latex-backed mats and rugs on their floors because of staining, discoloration or trapped moisture. Use felt or hard-plastic protectors, and let weight and a wall strap stop the sliding.
What if I can’t find a stud? Use a hollow-wall toggle bolt and plan on a quarter of its rated ultimate load. For TOGGLER’s BB in 1/2-inch drywall, that’s about 66 pounds.
Related Resources
Before you buy a giant, the 2026 store animatronics guide covers sizes, power and what’s still in stock, and the best Halloween animatronics roundup covers the ones sold on Amazon. Plan the room with the indoor decorating guide, and when a prop won’t fire once it’s placed, start with the animatronic repair guide. For outdoor props, see weatherproofing Halloween decorations.